

Table of contents
- Jenkins:
- SonarQube:
- Nexus:
- We can download the Jenkins server in our t2 instance by the following link below:
- We can use SonarQube from the docker container
- Similarly, We can use Nexus from the docker container
- Let's move to the Jenkins server and install a necessary plugin for our project
- We have to establish a connection between Jenkins and SonarQube
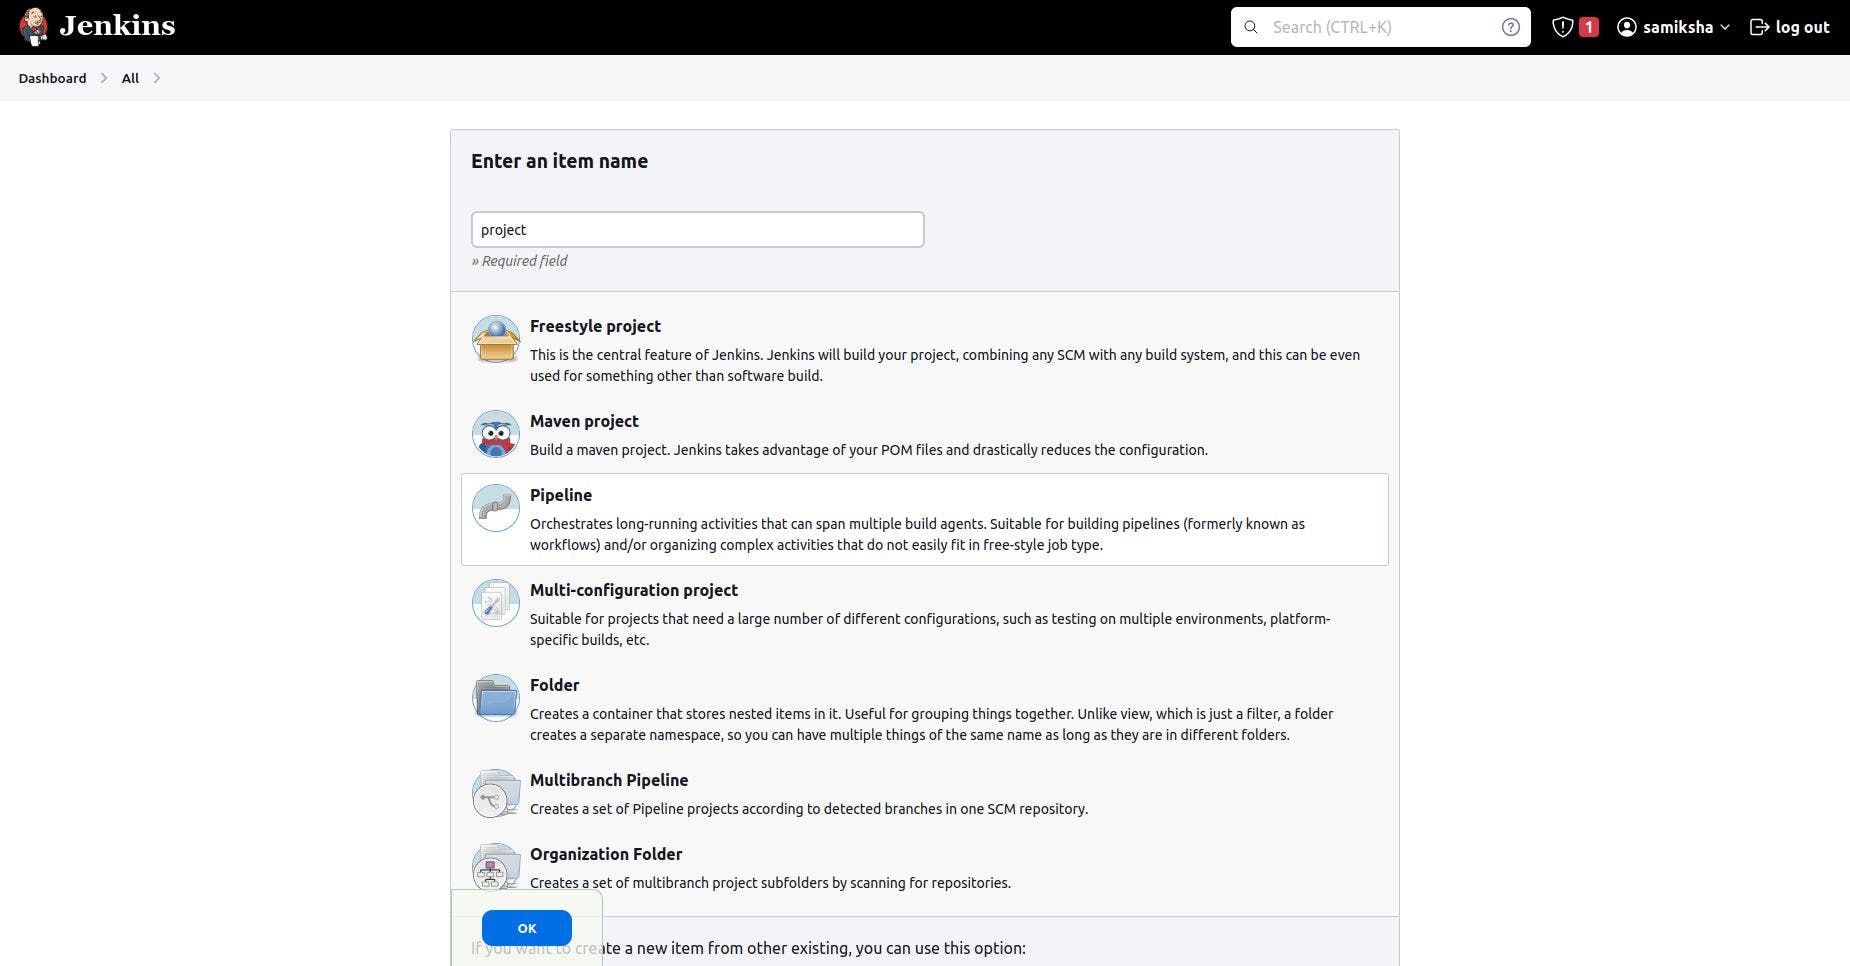
- Create a New Job for our project-03
- Now, We will push the artifacts jar file into our Nexus server
Here, We are creating one t2 medium instance for SonarQube and Jenkins Server and another t2 medium instance for Nexus in AWS.
Jenkins:
Jenkins is an open-source automation server widely used for automating various aspects of software development. It facilitates continuous integration (CI) and continuous delivery (CD) processes. Essentially, Jenkins helps automate repetitive tasks involved in the software development lifecycle, such as building, testing, and deploying applications.
SonarQube:
SonarQube is an open-source platform designed to continuously inspect and manage code quality. SonarQube performs static code analysis to detect bugs, security vulnerabilities, and code smells (poorly structured code) and It seamlessly integrates into the CI/CD pipeline, allowing for automated code analysis as part of the build process.
Nexus:
Nexus acts as a repository manager for various types of artifacts, including binaries, libraries, and build artifacts generated during the development process.
We can download the Jenkins server in our t2 instance by the following link below:
https://samikshyasapkota.hashnode.dev/process-to-install-jenkins-in-ubuntu
We can use SonarQube from the docker container
- First, install docker in our Ubuntu instance
sudo apt-get install docker.io
service docker status
docker run -d --name sonar -p 9000:9000 sonarqube
- By default, SonarQube is running on port 9000
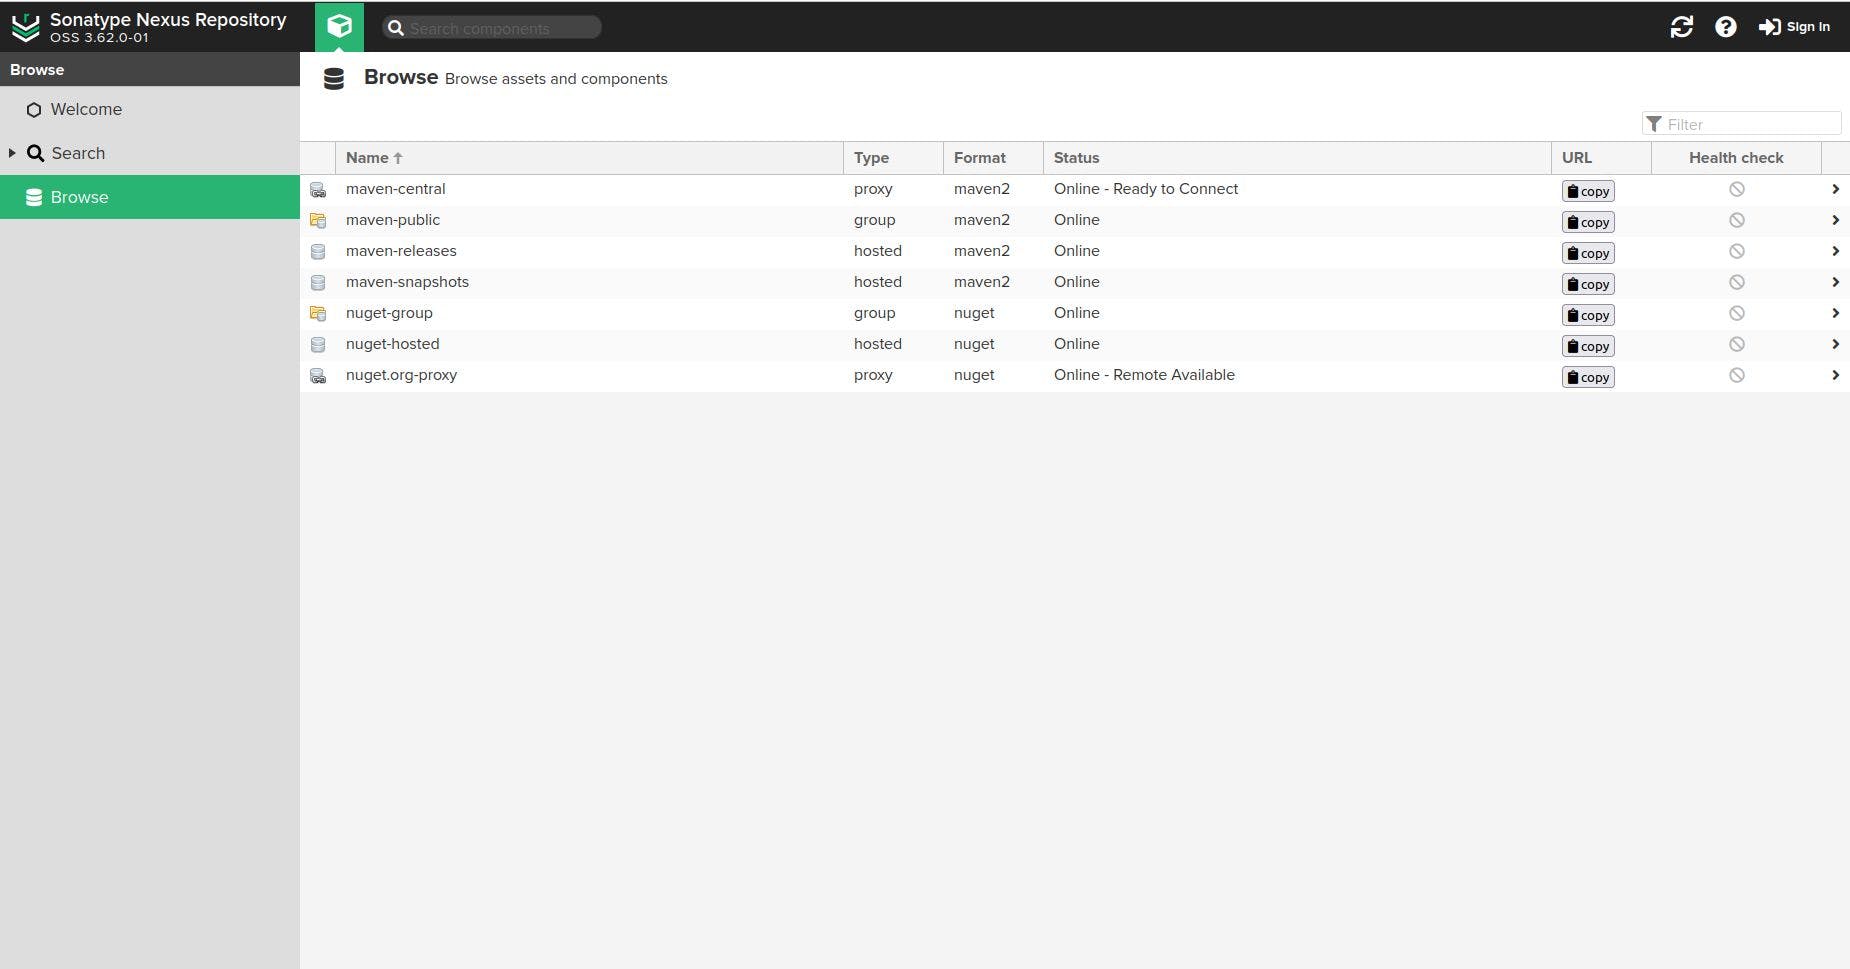
Similarly, We can use Nexus from the docker container
docker pull sonatype/nexus3
docker run -d --name nexus -p 8081:8081 sonatype/nexus3
docker exec -it nexus sh
- By default, Nexus is running on port 8081
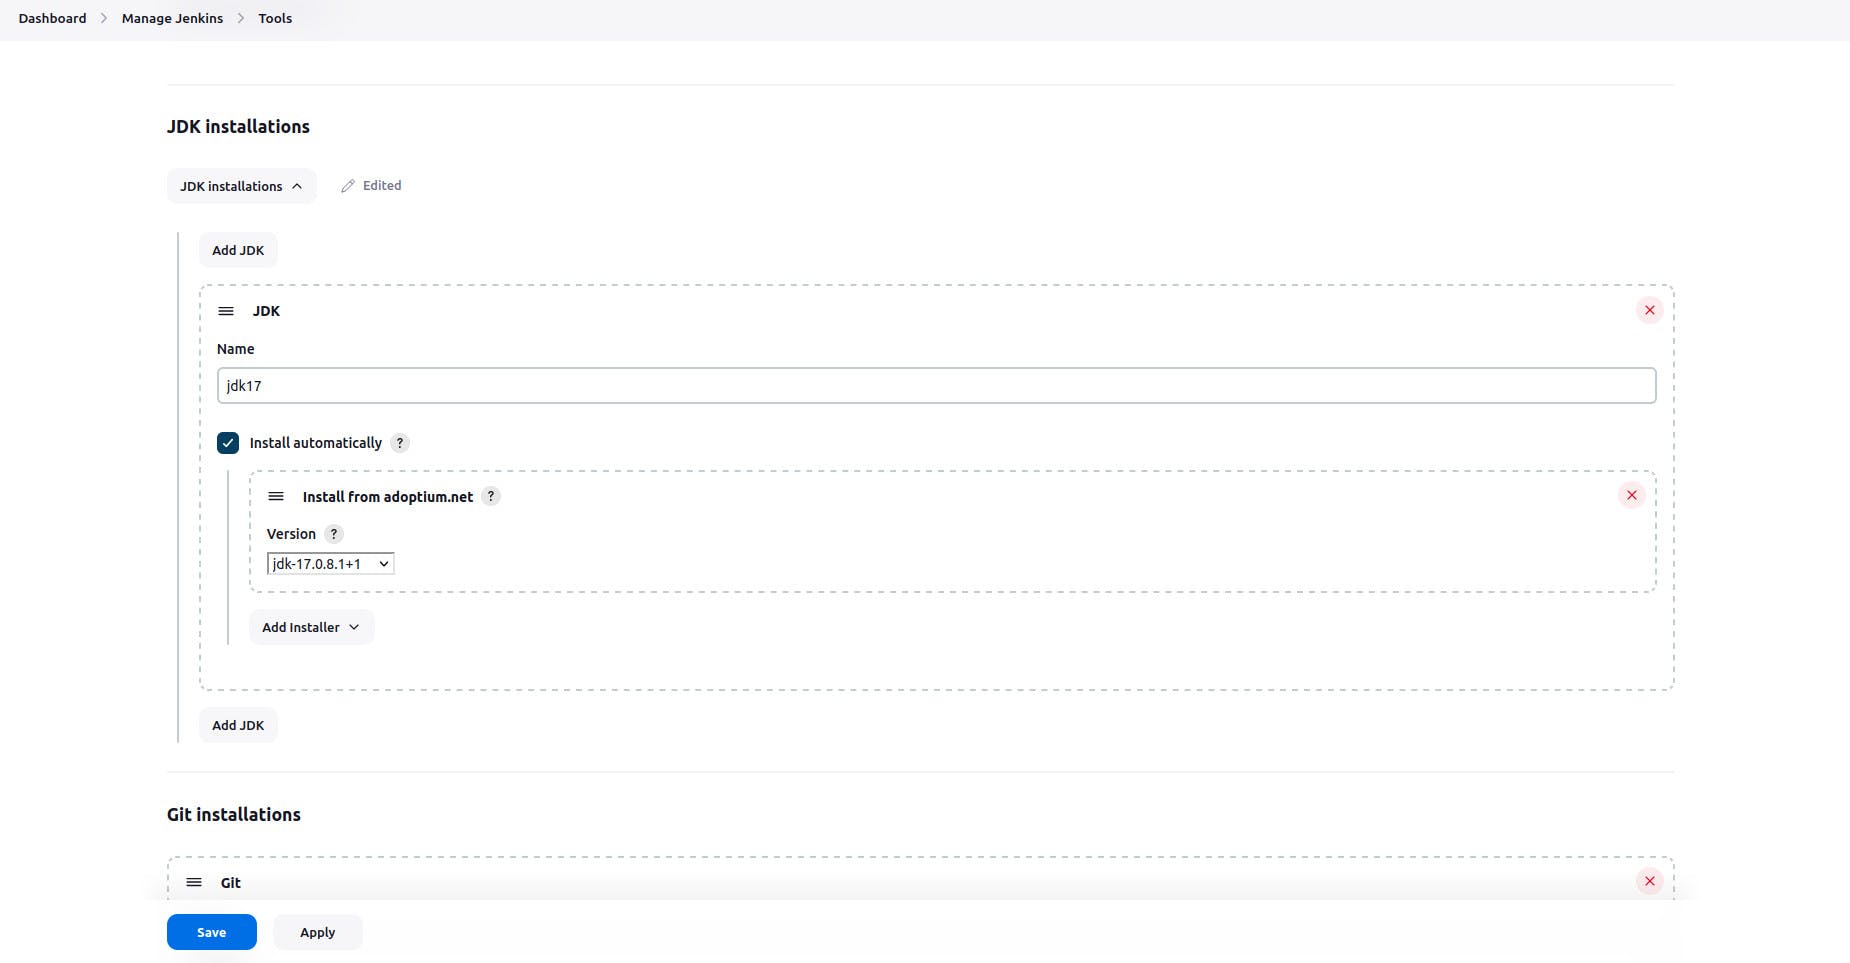
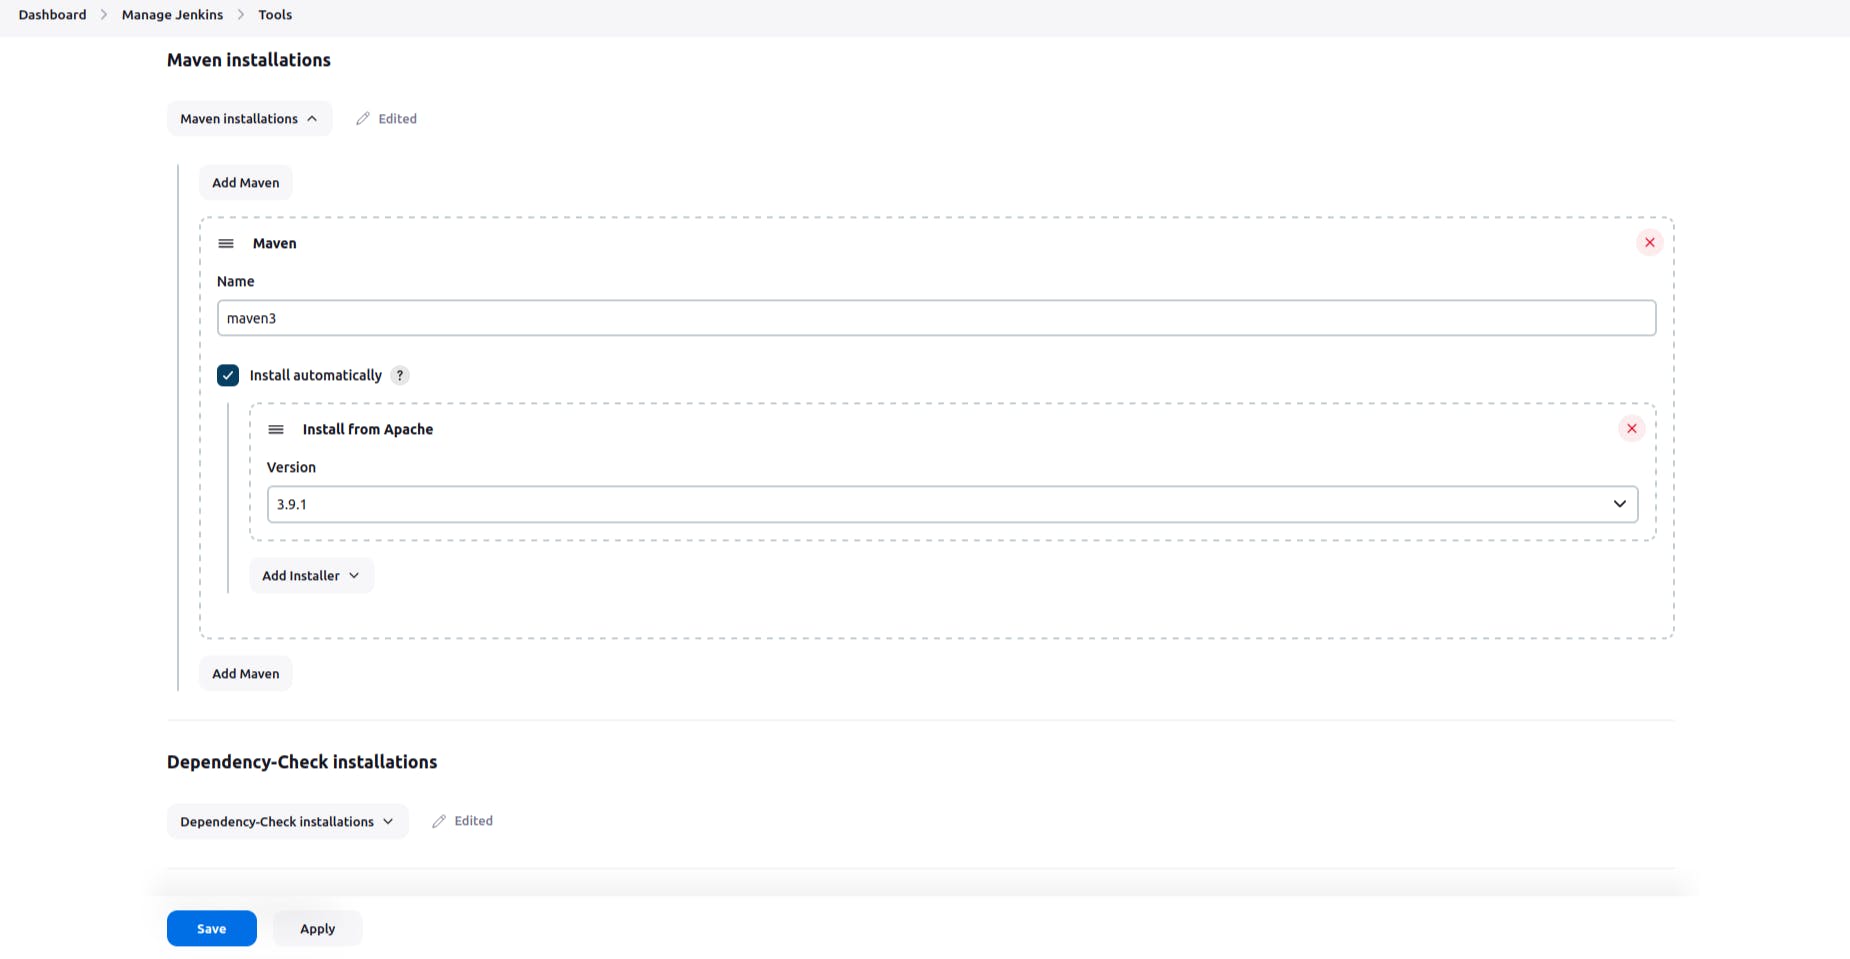
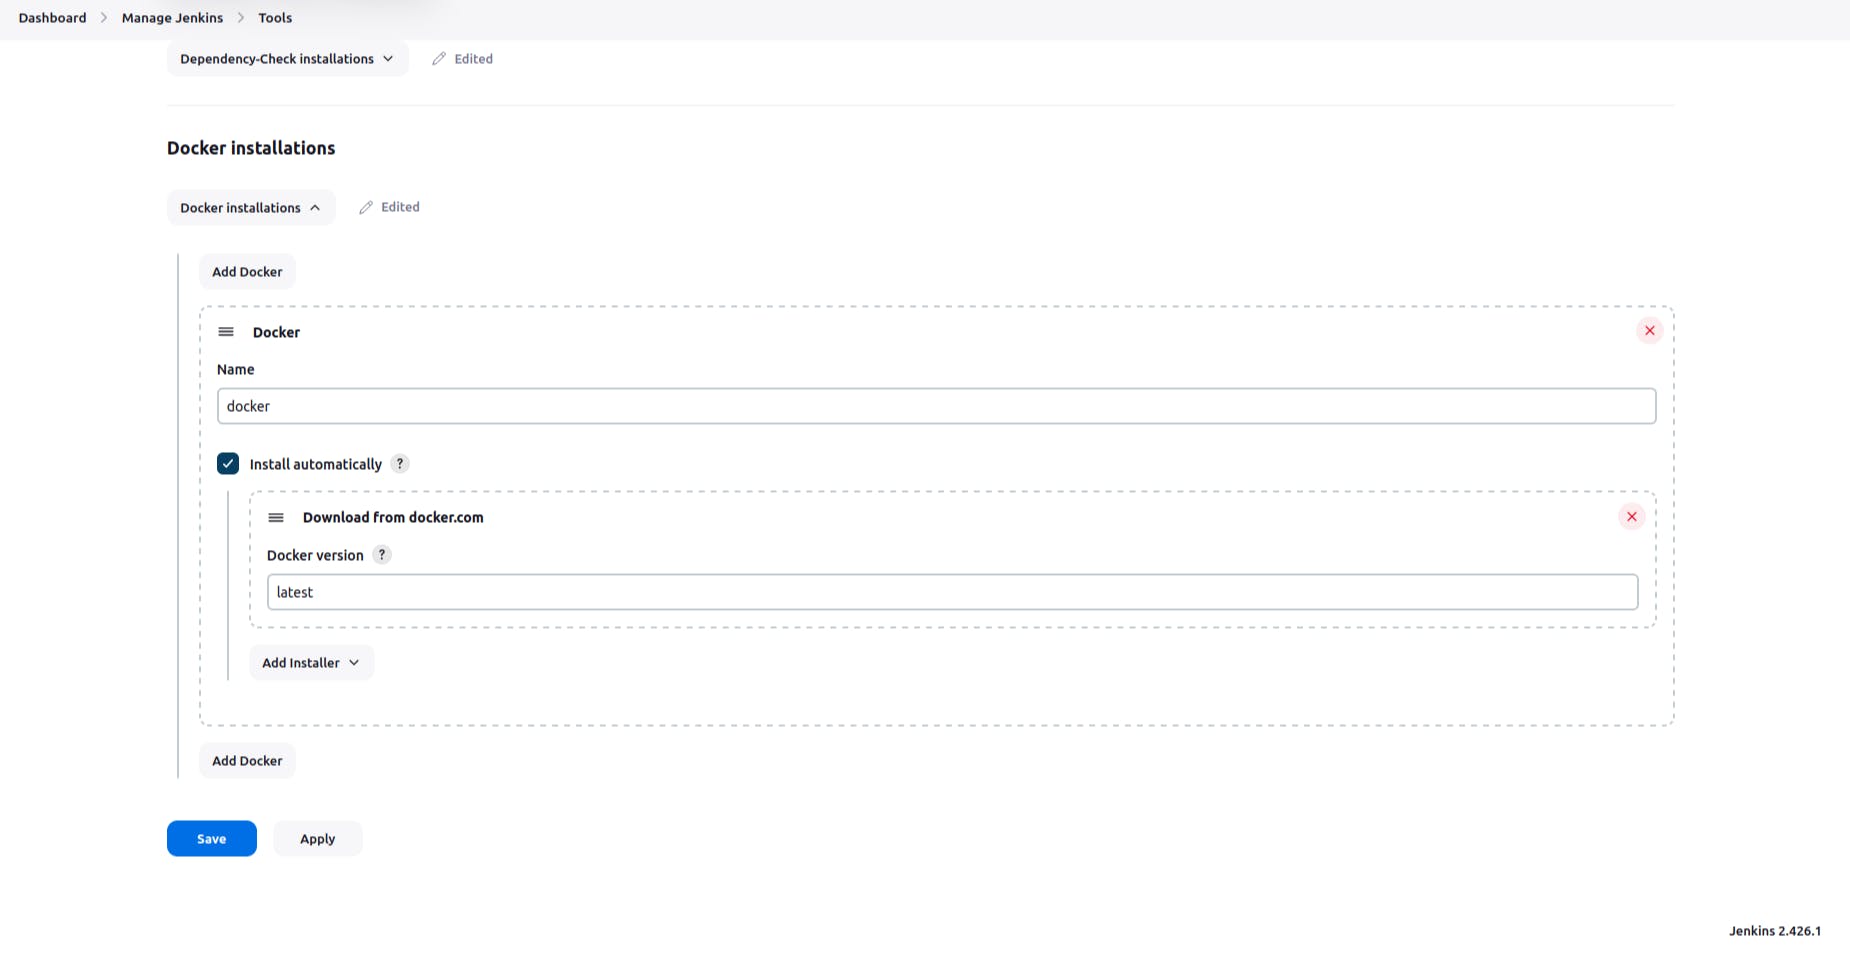
Let's move to the Jenkins server and install a necessary plugin for our project
Eclipse temurin installer, SonarQube Scanner, config file provider, Docker, Docker pipeline, Maven integration plugin
Now configure them to navigate to manage Jenkins and the tool
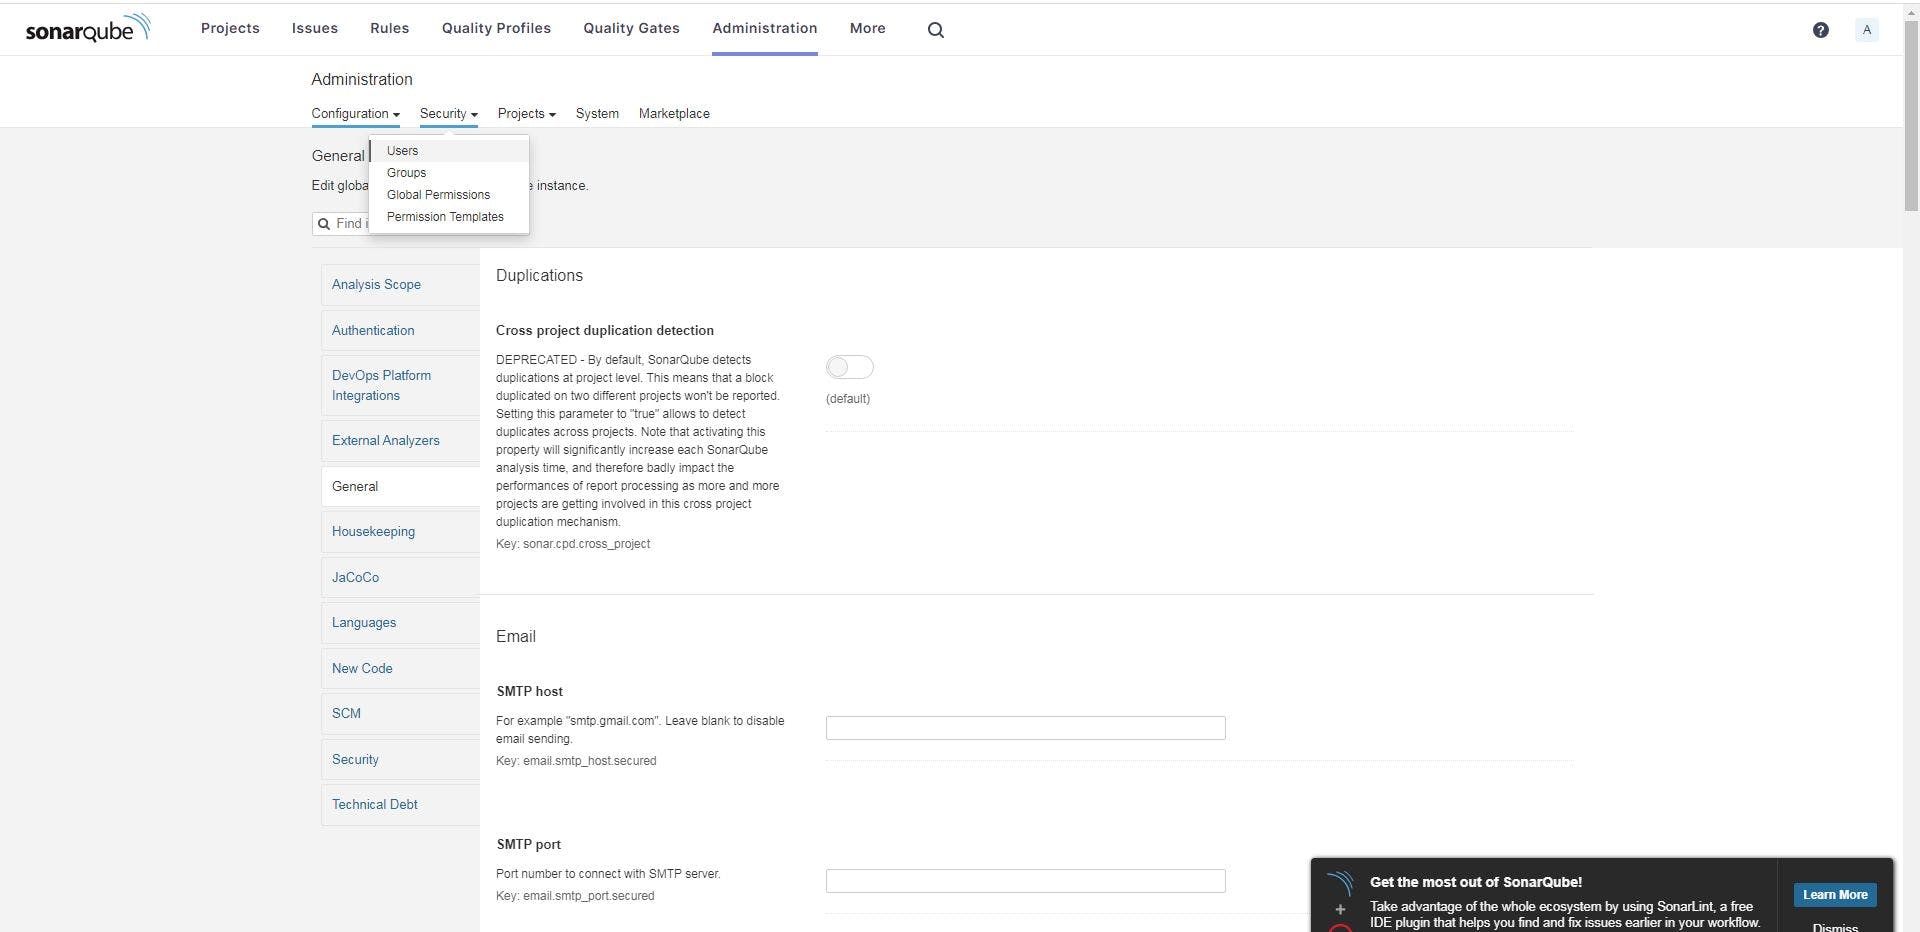
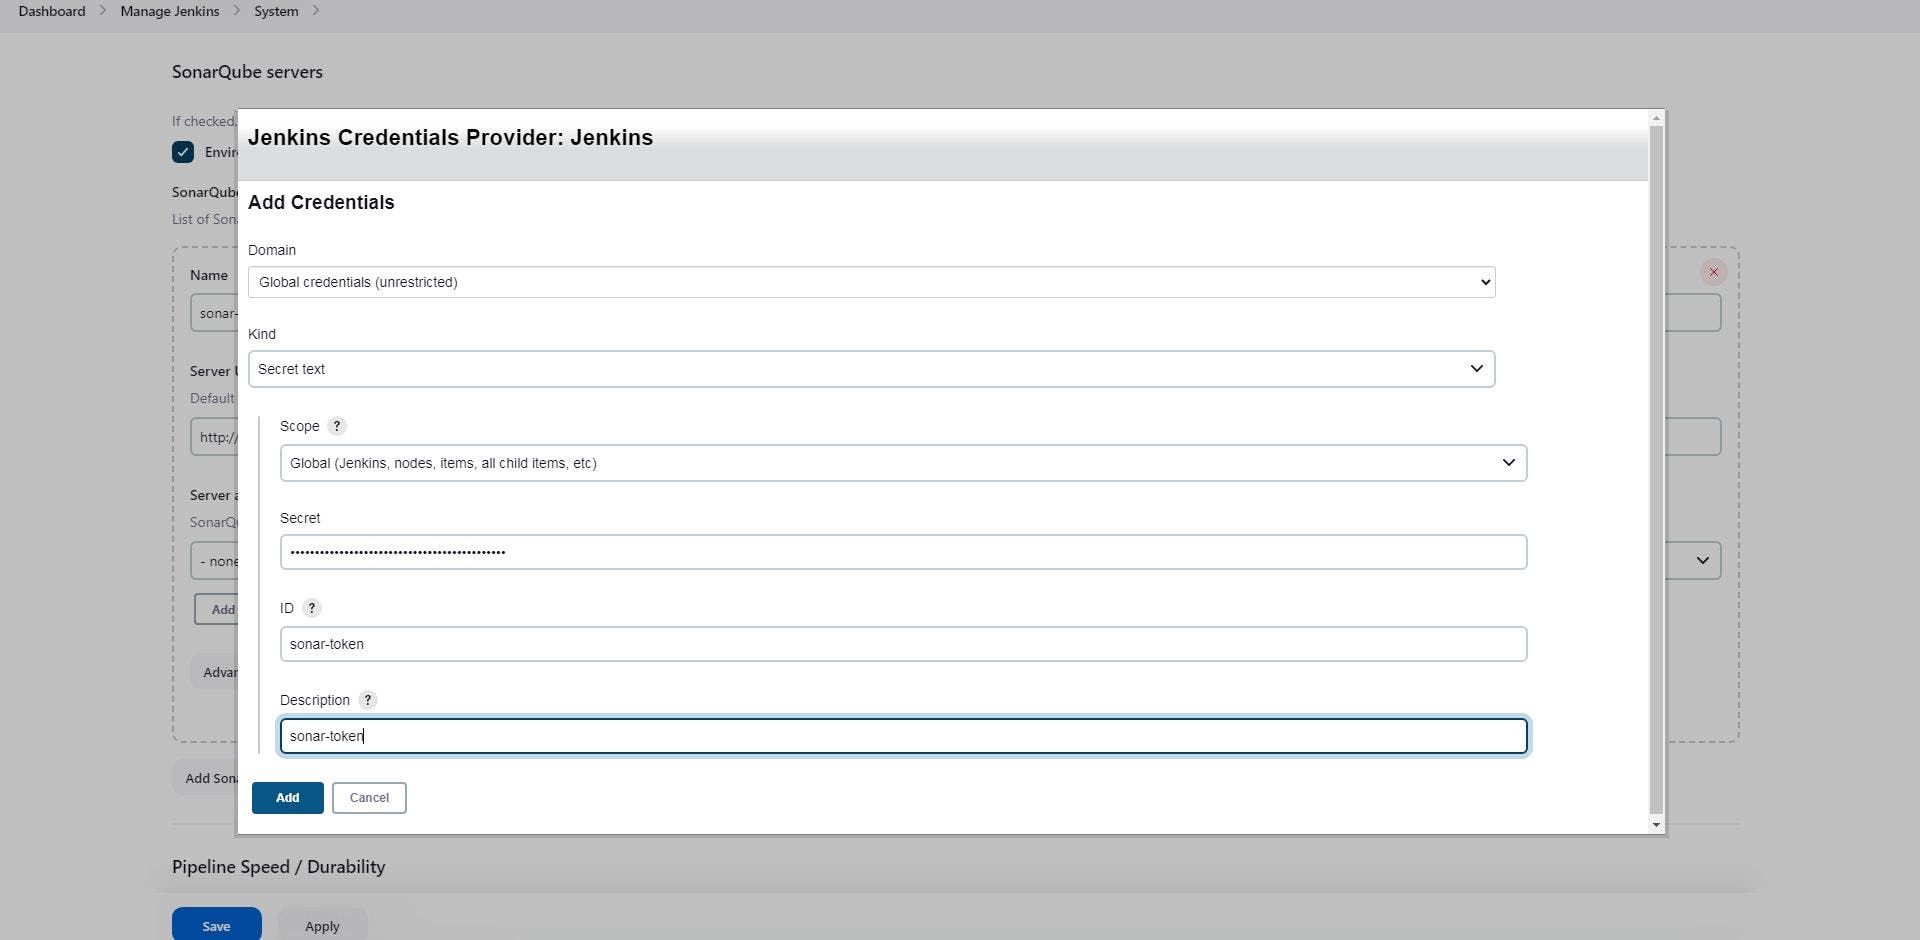
We have to establish a connection between Jenkins and SonarQube
go to the configure system & scroll down to the SonarQube servers

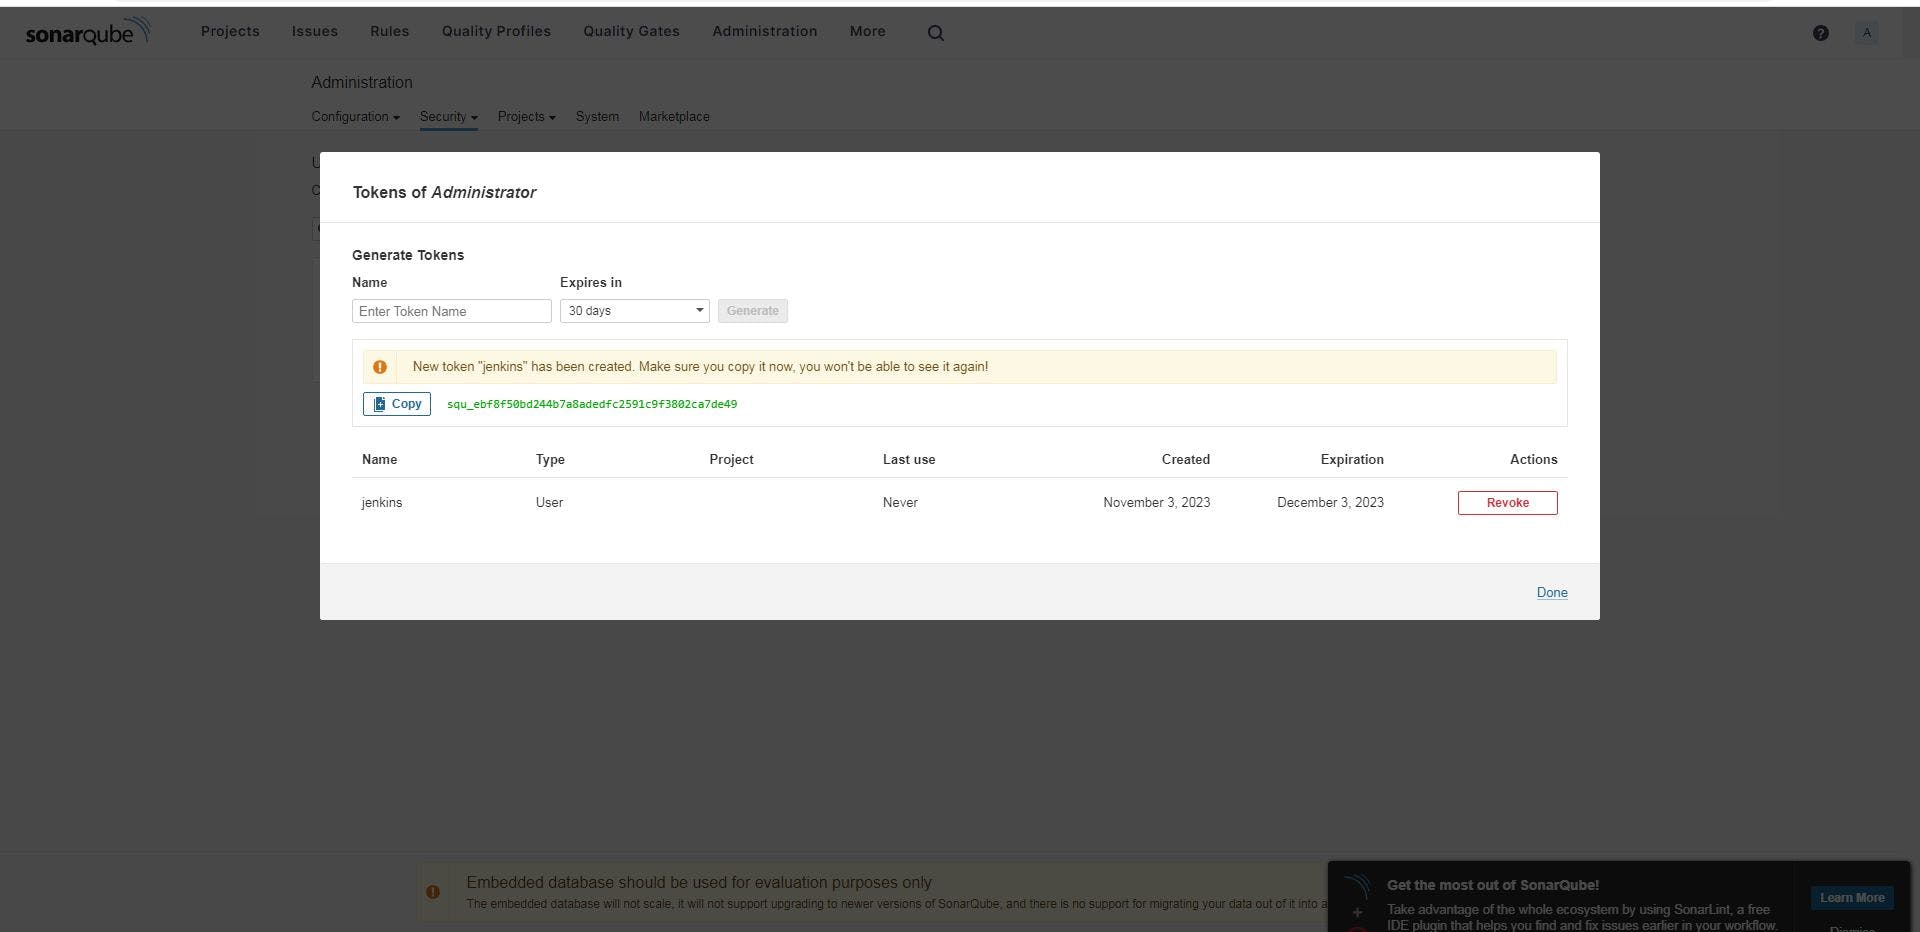
For the Authentication token go to the manage Jenkins & Configure System
go to the instance where we installed SonarQube
Click on token
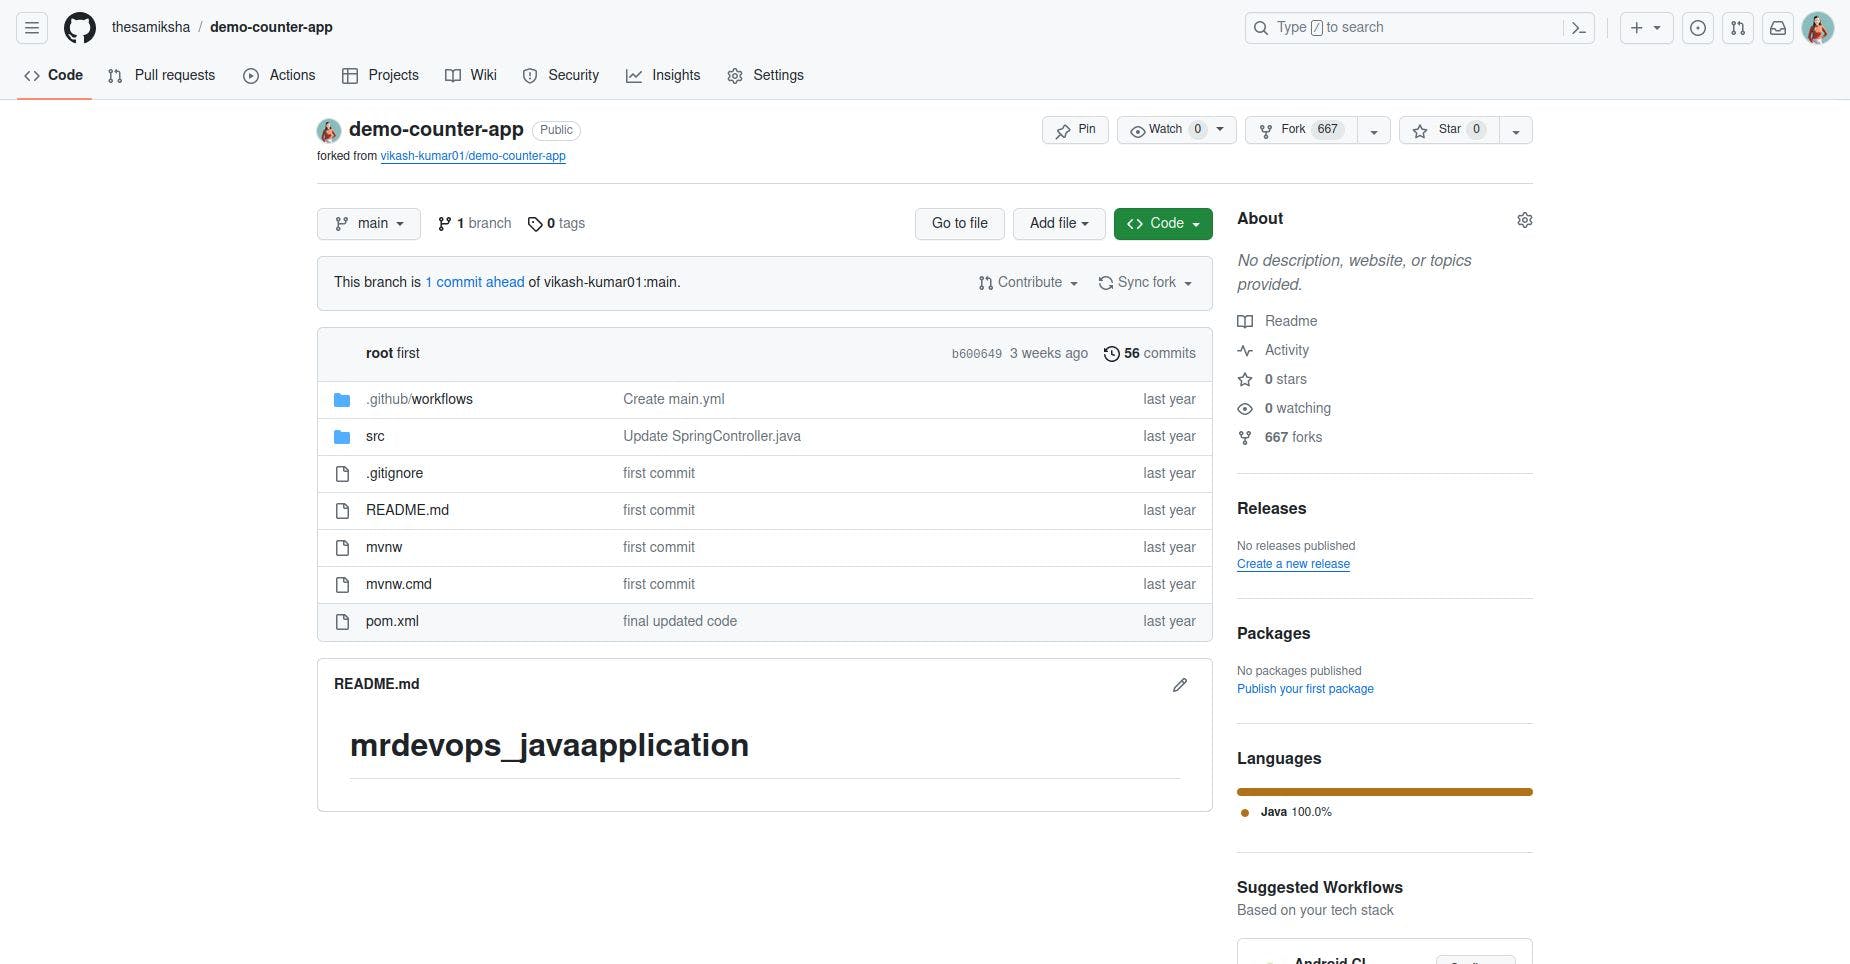
Create a New Job for our project-03

- put to your GitHub repository URL in the GitHub project
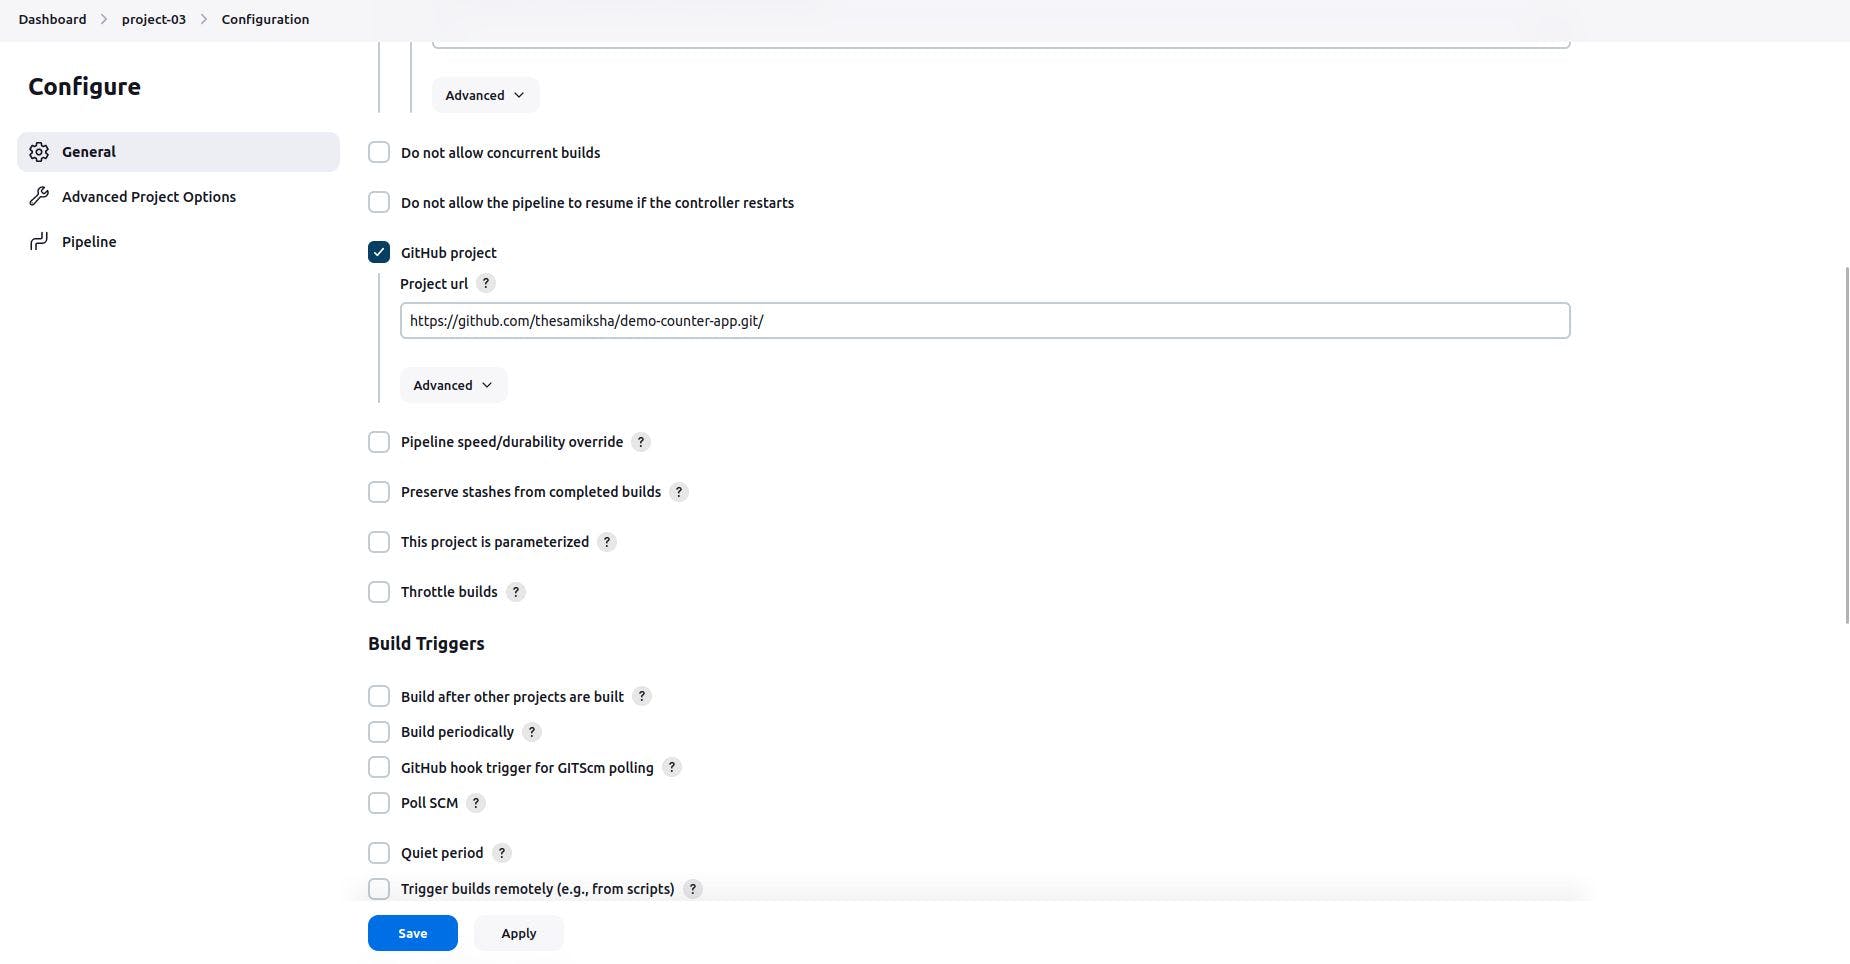
- code for GitHub url to clone our code
    pipeline {
        agent any
          stages {
            stage('Clone Code') {
                steps {
                    echo "clonning the code"
                    git url:"<https://github.com/thesamiksha/demo-counter-app.git>", branch: "main"
                }
            }
        }
    }
- Code for compilation of the source code (Compilation will make sure that all the syntax of our code is correct)
    stage ("compile") {
                steps {
                    echo "compile the code"
                    sh "mvn compile"
                }
            }
- Since We are using a third-party tool, we need to define it here
    pipeline {
        agent any
        tools {
            jdk "jdk11"
            maven "maven3"
        }

        stages {
            stage('Clone Code') {
                steps {
                    echo "clonning the code"
                    git url:"<https://github.com/thesamiksha/demo-counter-app.git>", branch: "main"
                }
            }
            stage ("compile") {
                steps {
                    echo "compile the code"
                    sh "mvn compile"
                }
            }
        }
    }
- We need to create an environment for SonarQube Scanner in the pipeline
    environment{
    SCANNER_HOME = tool "sonar-scanner"
    }
- Code for SonarQube analysis
    stage ("SonarQube analysis") {
    steps {
    withSonarQubeEnv('sonar') {
    ''' $SCANNER_HOME/bin/sonar-scanner -Dsonar.projectName = project-03 \\
    -Dsonar.java.binaries=. \\
    -Dsonar.projectKey = project-03 '''
    }
    }
    }
- Code for building our project (We are using -DskipTests=true) for skip the test for the code
    stage ("build"){
    steps {
    echo "building our code"
    sh "mvn package -DskipTests=true"
    }
    }
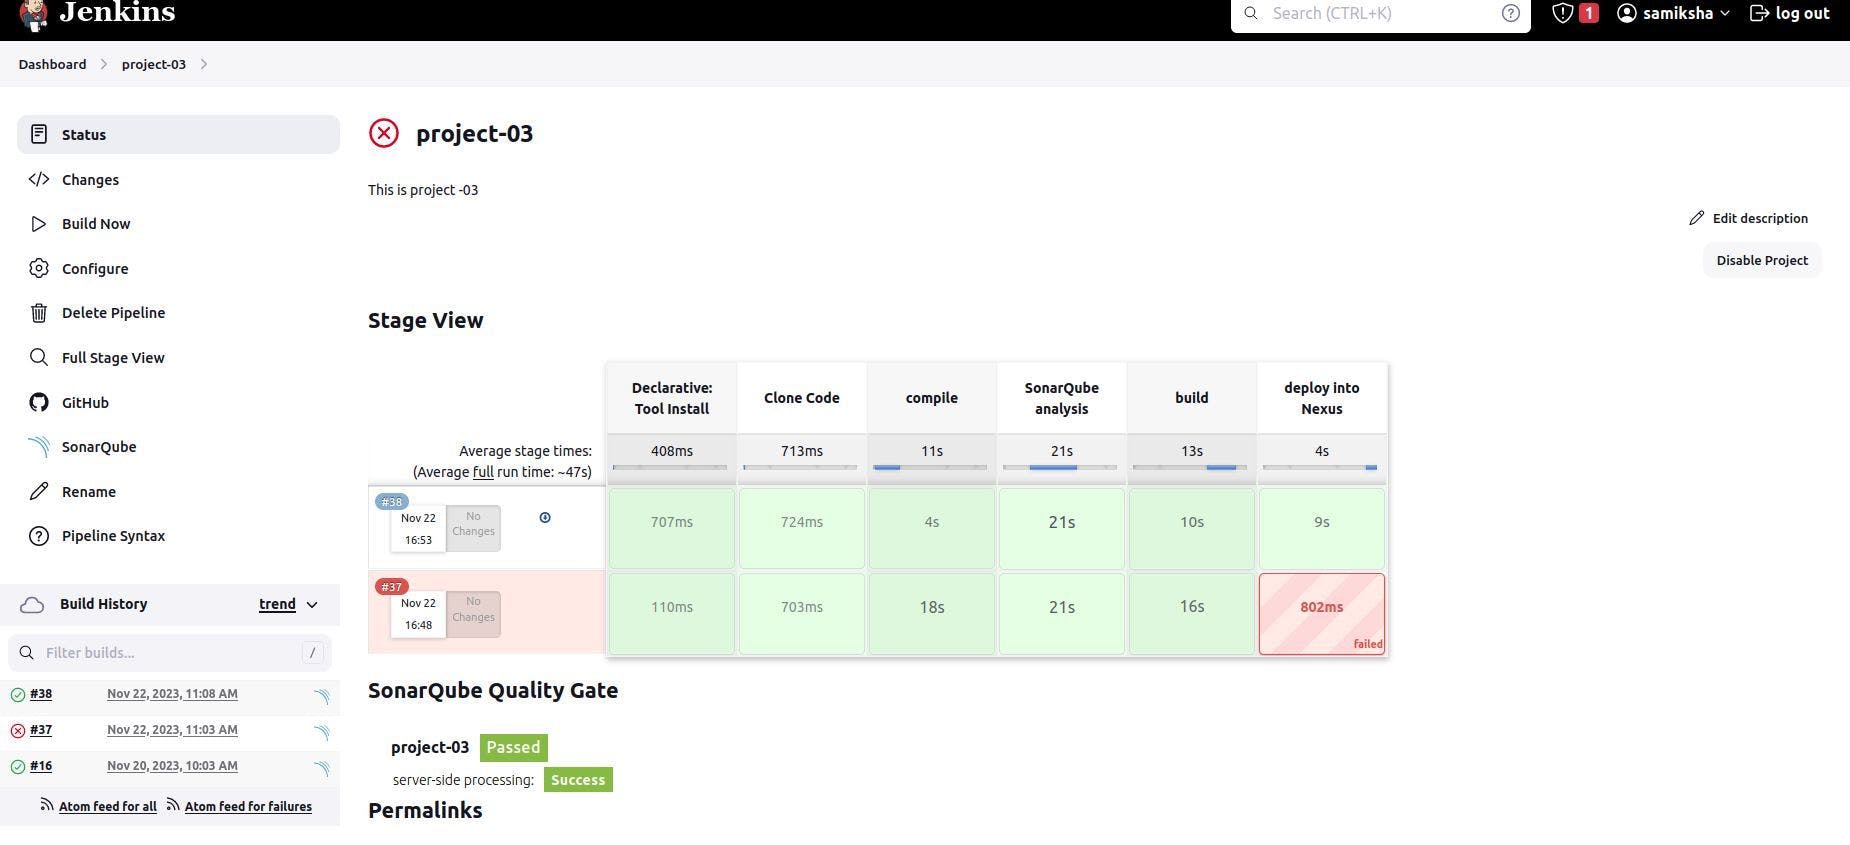
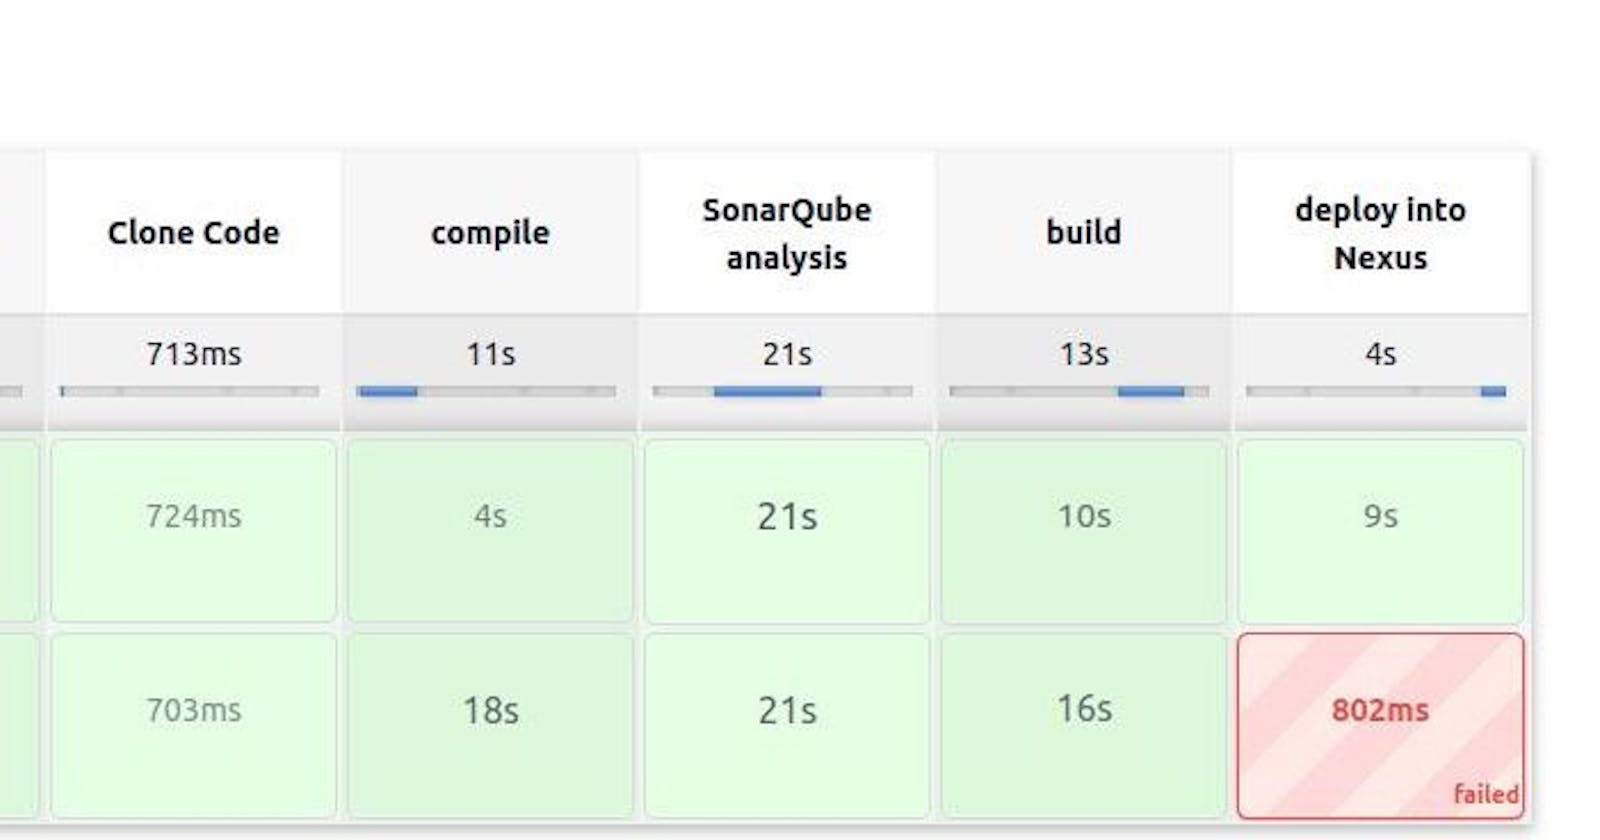
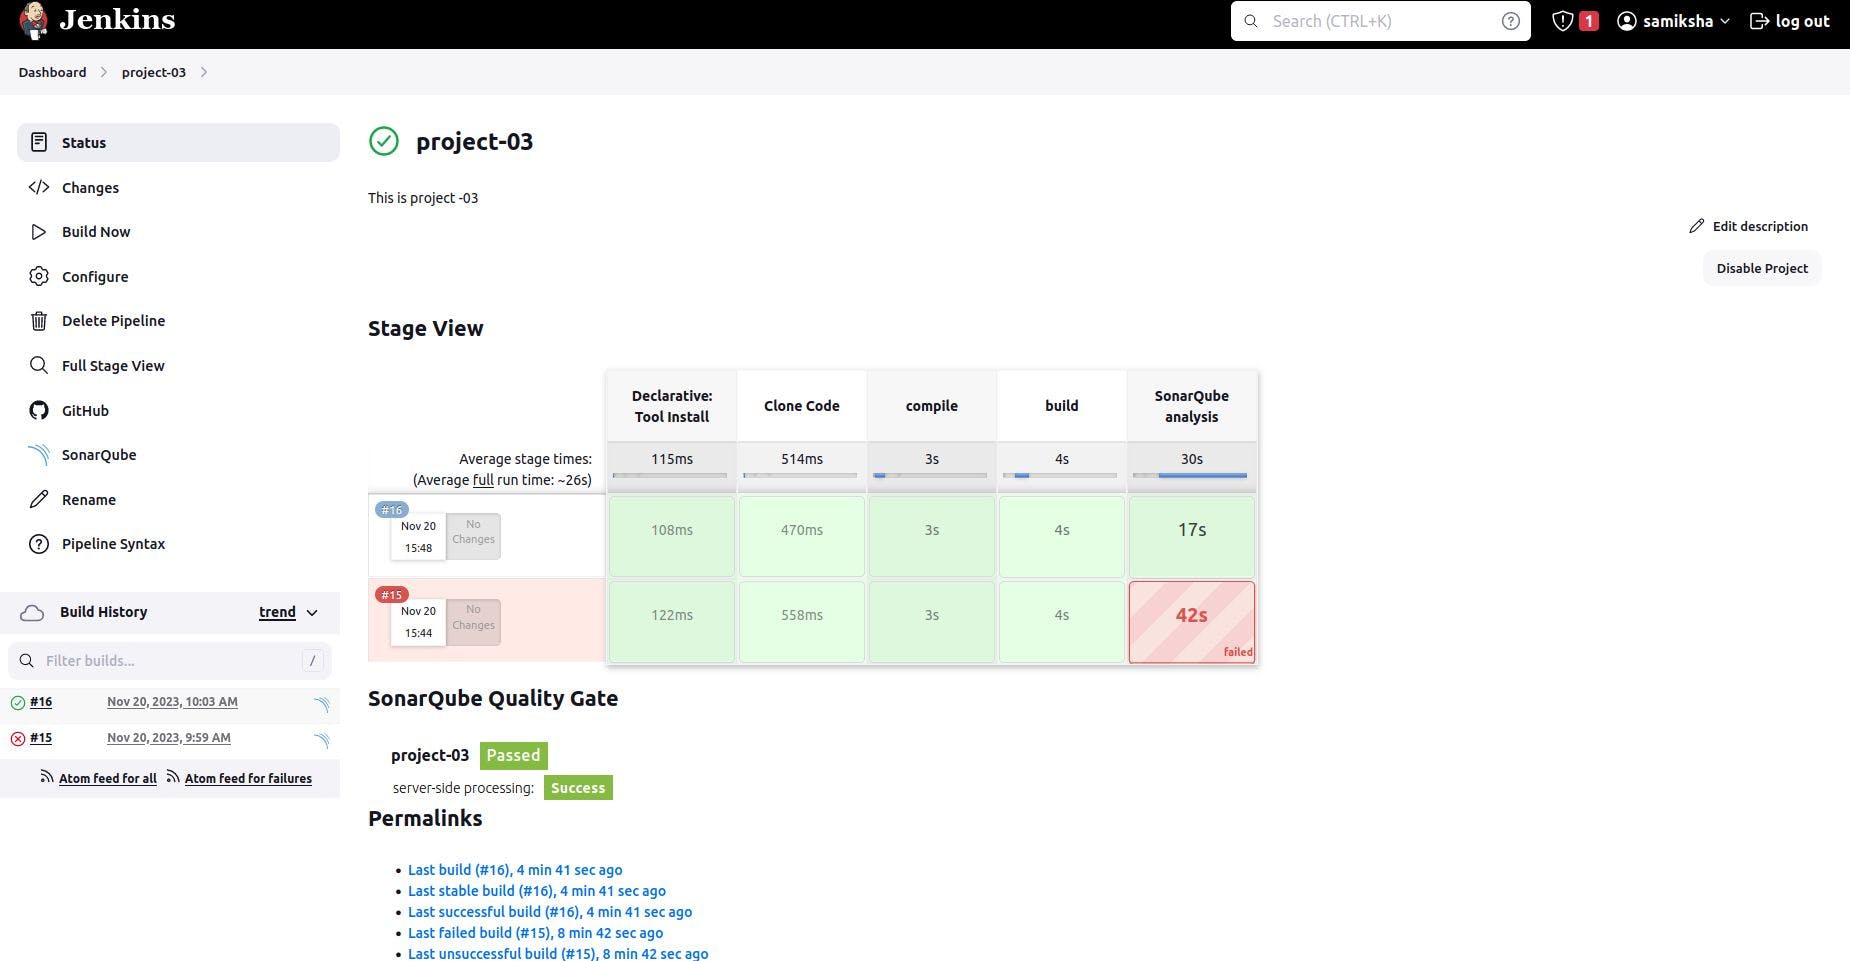
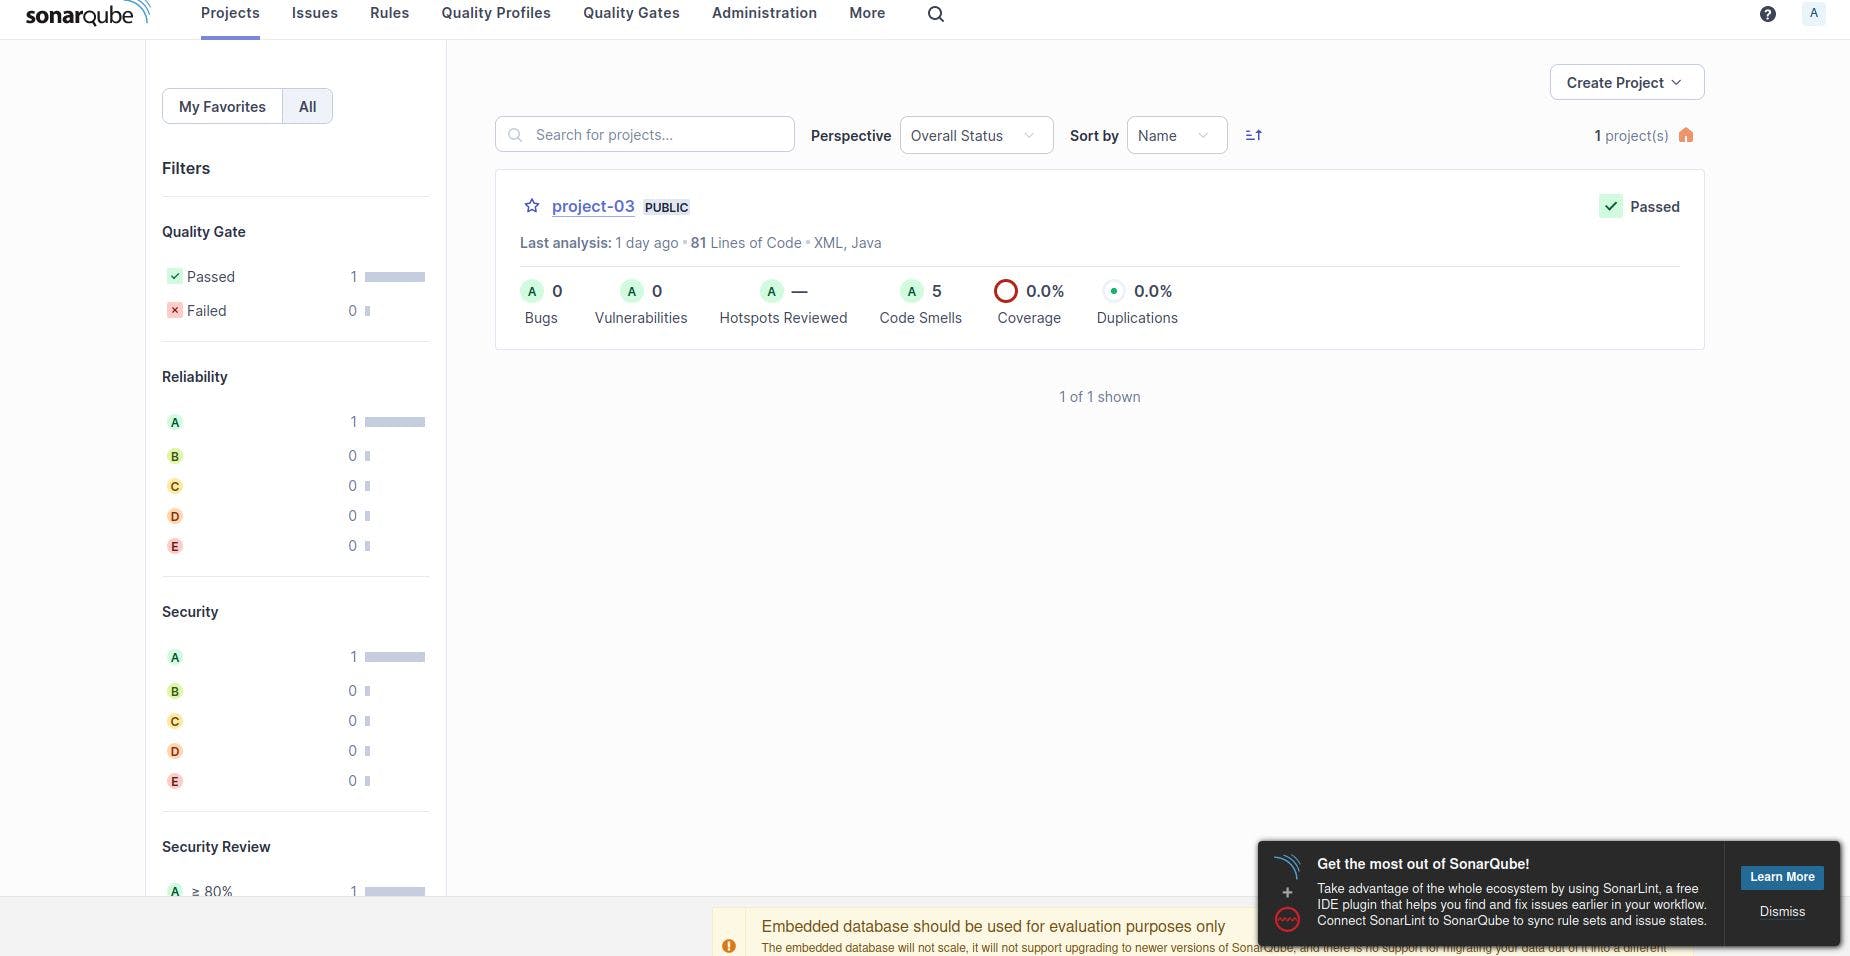
We can see our code is working successfully till here
Now, We will push the artifacts jar file into our Nexus server
This is our Nexus server which we need to configure inside our pom.xml file
go to the github account and navigate to our repository and click inside pom.xml file
- add this line to our pom.xml file before ending the project tag in github
                <distributionManagement>
                    <repository>
                      <id>maven-releases</id>
                      <name>maven-releases</name>
                      <url>**goto the nexus server and paste url from maven-release**/</url>
                    </repository>
                    <snapshotRepository>
                      <id>maven-snapshots</id>
                      <name>maven-snapshots</name>
                      <url>**goto the nexus server and paste url from maven-snapshots**/</url>
                    </snapshotRepository>
                </distributionManagement>
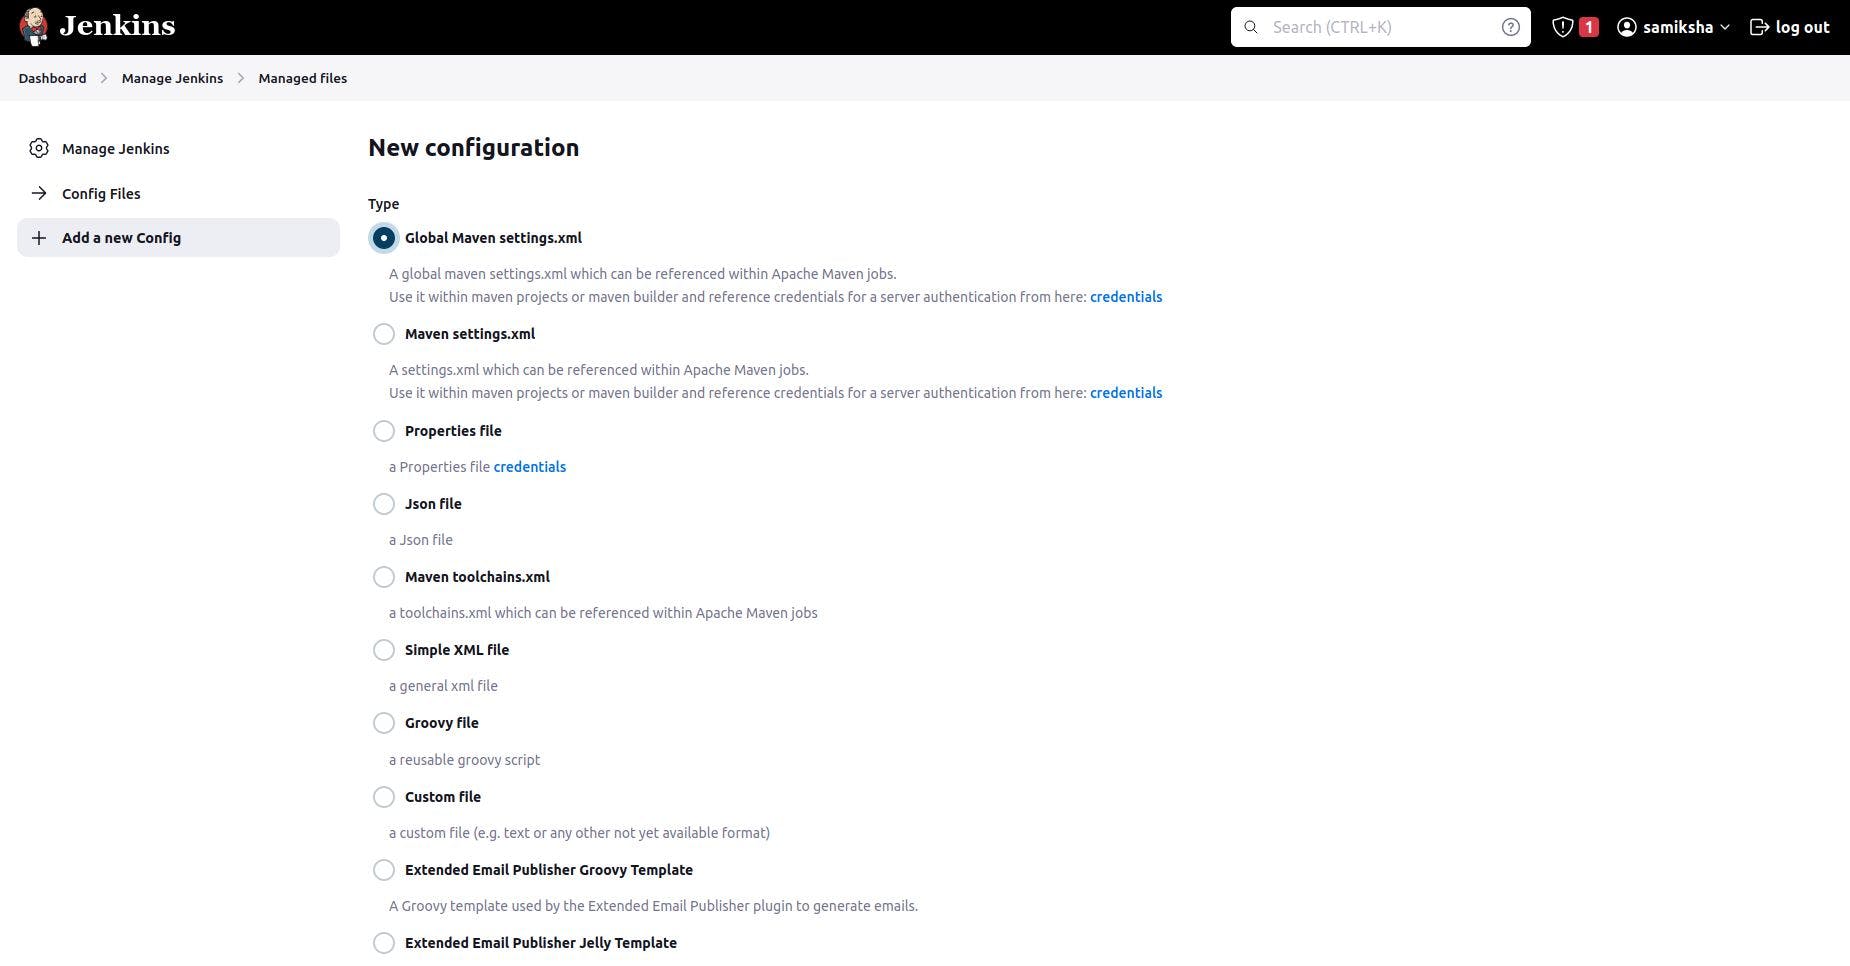
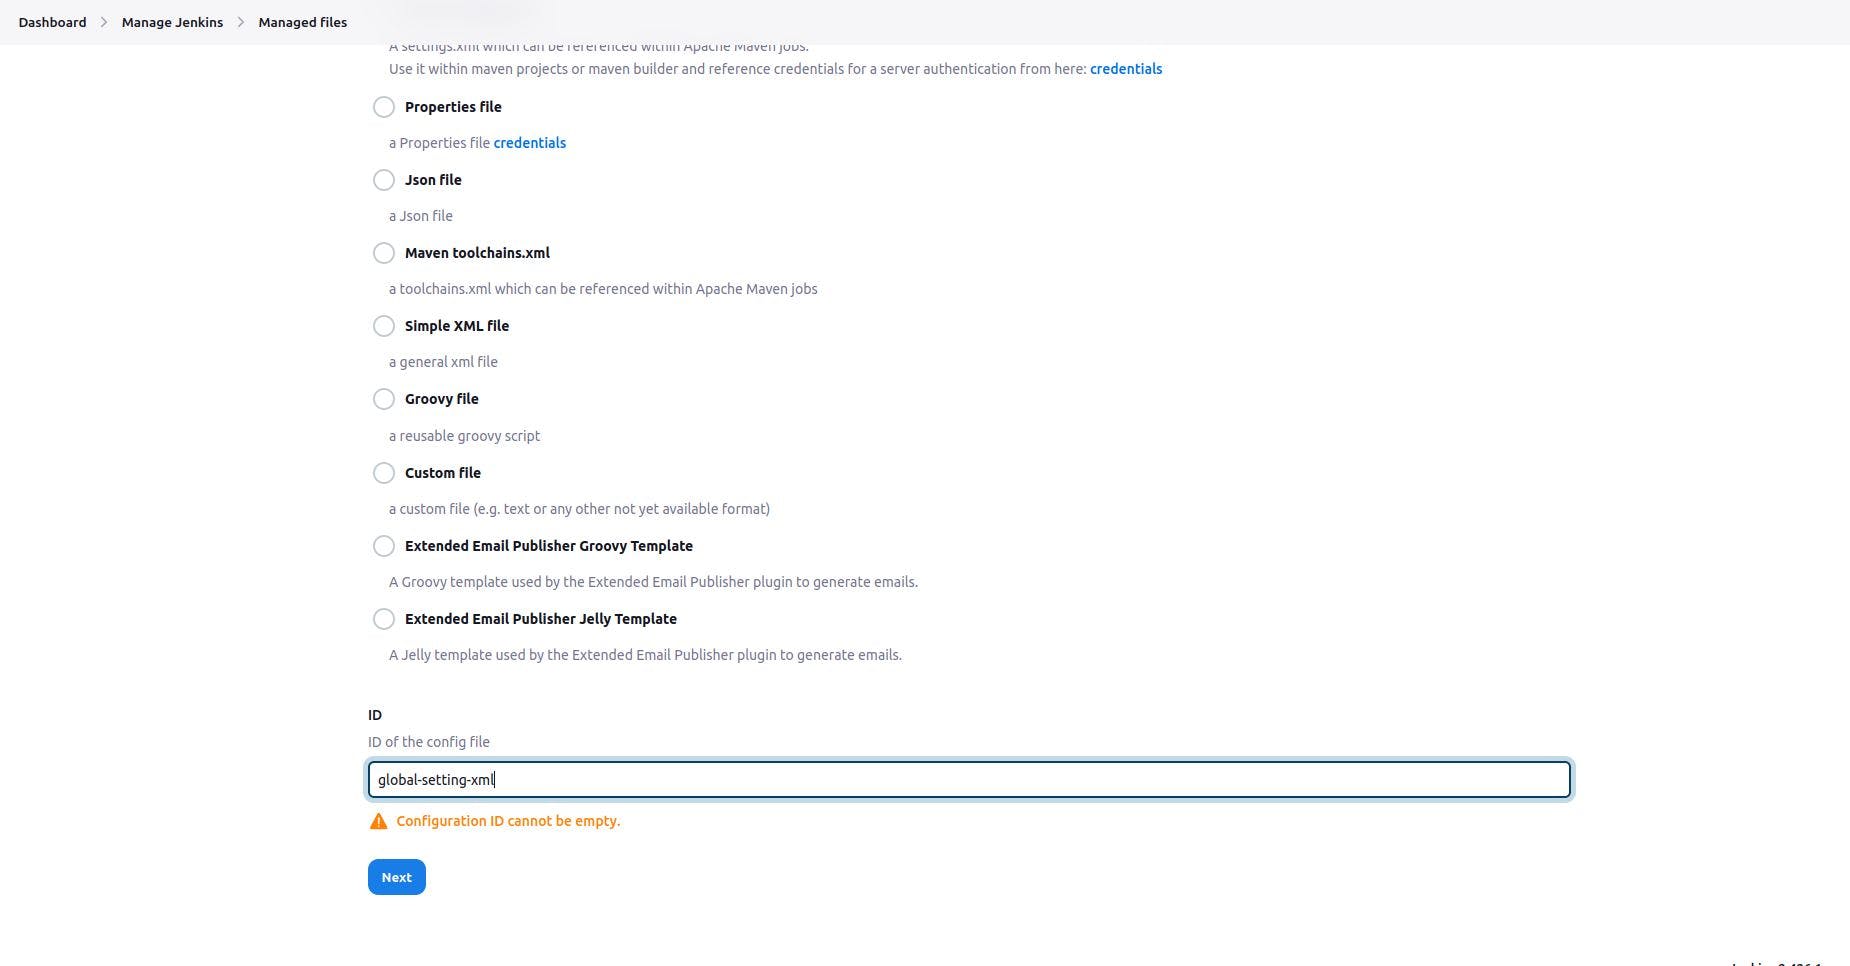
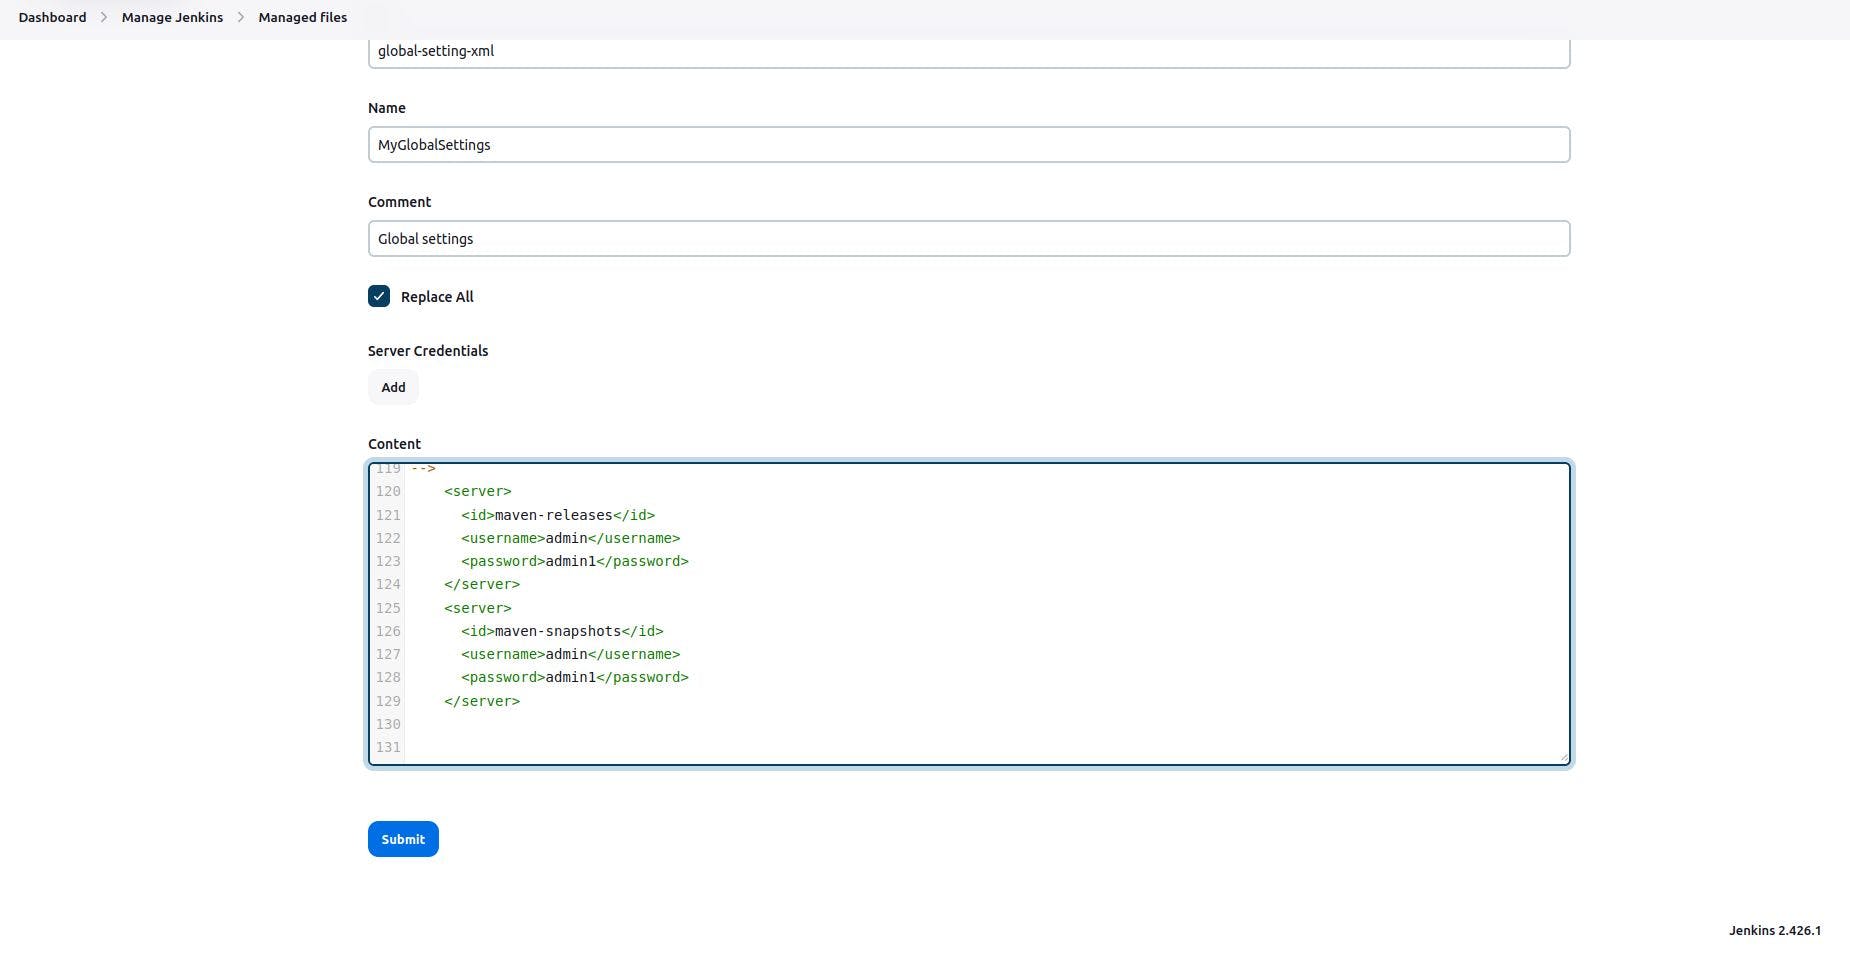
Again, go to Jenkins and we need to provide credentials (config file provider plugin) for creating a settings.xml file.
go to the manage Jenkins, managed files, and click on add new config
- we need to configure our credentials here inside the server
                    <server>
                          <id>maven-releases</id>
                          <username>admin</username>
                          <password>admin1</password>
                        </server>
                        <server>
                          <id>maven-snapshots</id>
                          <username>admin</username>
                          <password>admin1</password>
                        </server>
- Deploy our artifacts into Nexus
                    stage ("deploy into Nexus") {
                                withMaven(globalMavenSettingsConfig: 'global-setting-xml') {
                                    sh "mvn deploy -DskipTests=true"

                                }

                            }